No matter where in the world you go you’re likely to come across a waterfall during your travels. From the world famous waterfalls of Iceland to the hidden cascades of the Columbia River Gorge, I think you’d agree that these wonders of nature are always a breathtaking sight. But photographing waterfalls is tricky business and coming home with a photo you want to show off is harder than you might think… So, how can you shoot your own breathtaking long exposure waterfall photography??
Follow along and find out!
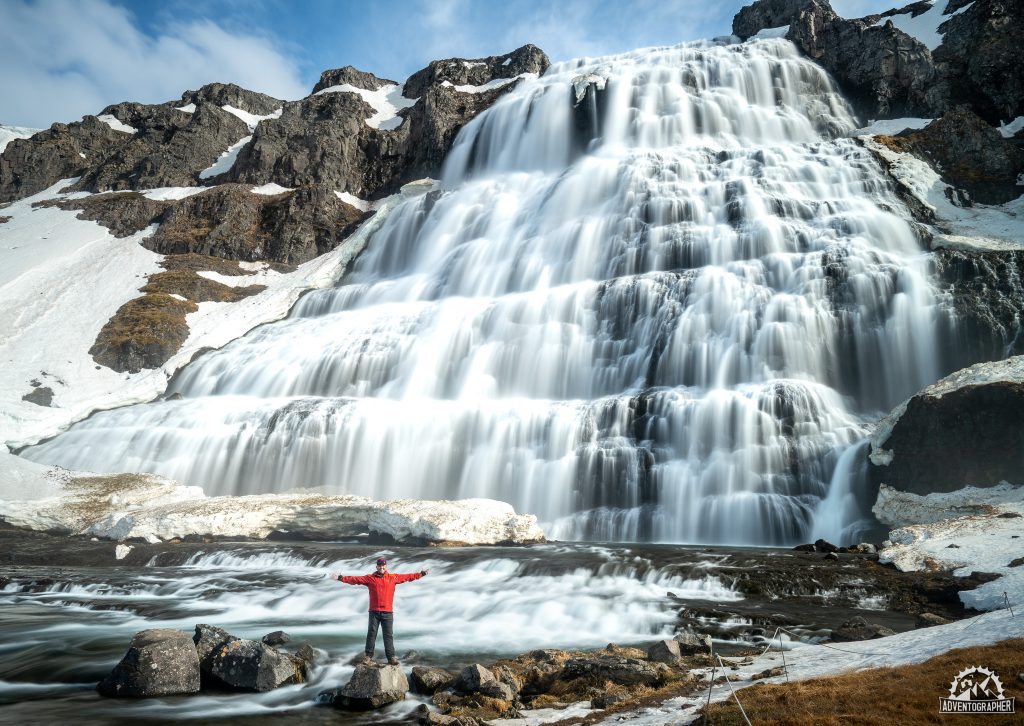
Taking waterfall photos is all about capturing the movement and intensity of the falls.
Freezing the motion of the water doesn’t often make for an interesting photo, no matter how great the light or composition. Smooth flowing streaks or blurred milky flows help convey the power of a waterfall and really let the viewer feel present in the image. To make that happen however you’ll need a few items…
What You Need to Photograph Waterfalls
Lets be clear right from the start, you really don’t need anything special to take amazing waterfall photos. Top of the line camera gear and equipment wont make your photo’s better. The gear you already own IS good enough and you’ll probably only need a few minor additions to make photographing waterfalls well a reality.
If you don’t already have them you’ll want to invest in:
1) A Sturdy Tripod
Because we’ll be using a slow shutter speed to create the streaky or blurred waterfall effect we cant have the camera moving around. A sturdy tripod is an absolute necessity to keep our camera planted firm, without it we’d just end up with a photo where everything was blurry—been there done that…
Tripods can range from simple $50 units to fancy, lightweight, carbon fiber systems costing upwards of $1500. You dont need to go crazy here, but buying a quality tripod will payoff in the long run. For travelling I love my Sirui T-025SK Carbon fiber tripod but a less expensive aluminum version is available as well.
2) A Wide Angle Lens
For the best waterfall photography you’ll want to have a nice wide lens. This lets us get up close and personal while still capturing the whole waterfall in our photo. You’ll be looking for something in the range of 14-24mm focal length. Amazon has a huge selection!
3) A Neutral Density Filter
Now that we’ve got our camera stable and a lens wide enough to capture the scene we will need a neutral density filter. What are neutral density filters you ask? They’re like sunglasses for your camera albeit sunglasses that don’t change the color of the light being captured by the camera and lens—hence the “neutral”
ND filters come indifferent shapes and sizes depending on the lens you’ll be using and different tints—densities—for how much light you want to block out. For long exposure waterfall photography use a 3 stop—sometimes referred to as an ND0.9— ND filter, which will let only 1/8th of the ambient light through to your camera.
This reduction in light is what allows us to lengthen our shutter speed and capture the waters movement without ending up with a completely overexposed image. Again prices range from inexpensive to a days work or more as special coatings etc come into play.
You dont have to spend a lot though! We still use a mid range ND filter pretty often in our travels! choose an ND Filter correctly sized for your lenses diameter!
Long Exposure Waterfall Photography Case Study
With the gear out of the way we can finally create some waterfall images! As with all our Photo Friday segments I try to post a photograph I’ve captured throughout my travels that employs the techniques discussed. It’s somewhat of a case study in understanding the challenges & thought process of creating the image.
Today we’re talking long exposure waterfall photography, so where better to look than my photos from the Waterfalls in Iceland?! Specifically, one of my favorite shots—and one of the few sunsets we got on the trip—from Kirkjufellsfoss on the Snaefellsness Peninsula of Iceland.
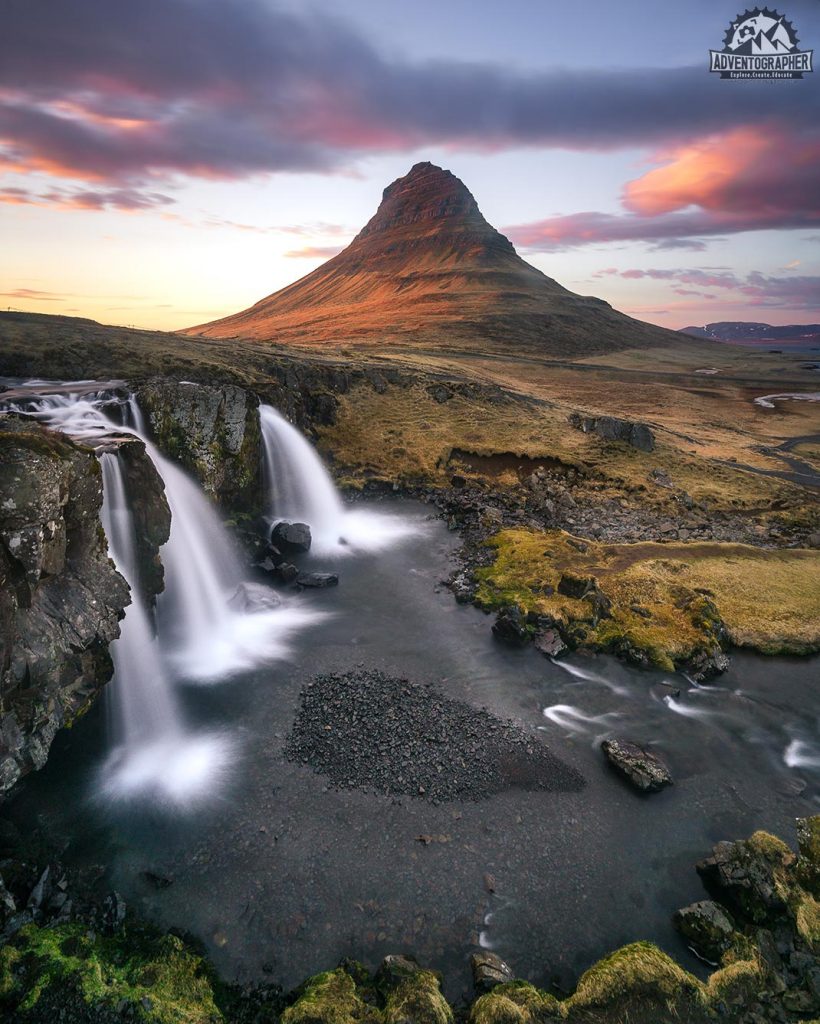
ISO: 125 Shutter Speed:10 Seconds Aperture: ƒ11 Lens: Sony 16-35mm ƒ4 Filters: Circular Polarizer, 6-Stop ND, 3-Stop Graduated ND
Camera Settings
To take a quality long exposure waterfall photo you’ll need to master your settings. This is best achieved my shooting in “manual” mode but can be done in some automatic modes as well.
Shutter Speed
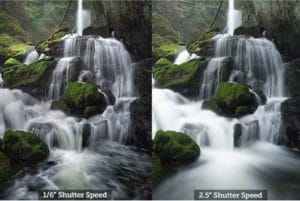
Shutter Speed is the main control we’re concerned with. Longer shutter speeds allow moving items to blur while shorter ones tend to freeze motion. For most waterfall photography I start at 1/4 to 1/2 second shutter and adjust from there.
Knowing how to read the waterfall is key! Its it fast moving requiring only 1/2-1 second of exposure or is it slower needing more like 10-20 seconds? At 1/2 second most waterfall photos start showing some blur and streaking. As the shutter speeds increase, up to and beyond the 10 seconds used in the photo above the blur increases to a point of becoming a white, detail-less streak. Finding a happy medium is the trick here!
Remember: Too long a shutter speed and you’ll loose detail, too short and you wont get the nice blurry flows.
Aperture
Long exposure waterfall photography doesn’t rely on any set aperture. Choose a somewhat closed down aperture like ƒ11-ƒ16 in order to ensure you get the entire scene in focus. Remember aperture controls not only the amount of light that enters the lens but also your depth of field!
In the photo above I chose to shoot at ƒ11 in order to get the foreground, background (mountain & sunset) & the waterfall itself in focus.
Its true that too high an aperture—ƒ22 per say—can cause a loss of image quality. If you need to close the aperture down that far to get the right shutter speed—blur—then dont worry. Photography is a game of compromise. The slight loss in image quality when viewed at 100% will pale in comparison to capturing the water’s movement!
Filters
Finally filters can come into play. Sometimes when looking for the right shutter speed for your waterfall you simply run out of adjustment. You dial in the aperture and shutter speed you want, click the shutter and are greeted by a beautifully overexposed image. Luckily—following the advice above—You’ve got an ND filter in your camera bag to save the day!
In the photo above I stacked 2 different filters.
I used a polarizing filter to take the glare off the water below the waterfalls—an effect that cant be recreated in post processing. Following the polarizer I used a 6-Stop LEE Filters “little stopper” that cut the light entering the lens by 64x. This drop in light let me take my properly exposed shutter speed of 1/6th of a second and drop it all the way down to 10s capturing the falls movement!
The Take Away
Taking an excellent long exposure waterfall photo is about more than simply walking up, pointing your fancy new travel camera and clicking the shutter. The time invested in finding the best angles, composition and settings will pay dividends in the end. Remember, a great photo is created, not taken!
In the end a few basic photography accessories & tips can make long exposure waterfall photography both easy and fun. Not only will you enjoy making these images but you’ll have something to be proud of and hang on your wall after you unpack your luggage or hang up your travel backpack. Now get out there and Explore, Create & Educate!


